How to Build Your Own Beer Racks

Homebrew Talk - Beer, Wine, Mead, & Cider Brewing Discussion Forum

Help Support Homebrew Talk - Beer, Wine, Mead, & Cider Brewing Discussion Forum:

This site may earn a commission from merchant affiliate links, including eBay, Amazon, and others.

stupac2

Well-Known Member
Joined
Apr 12, 2013
Messages
10,070
Reaction score
19,372
Location
Oakland, CA
I've posted elsewhere that I built my own modular beer racks, and love them. I've been asked for the plans a few times, and posted them in random threads, but I've always meant to write up some instructions and give some helpful advice for people who aren't expert woodworkers (note: I am not even close to an expert).

First, a confession. I did not build these totally from scratch, I modified some racks I got off of craigslist. Similar ones are here. But, since I live in California I'm concerned about earthquakes, and in an earthquake those bottles are going to be on the floor. So I made some new front pieces that hold the bottle better.

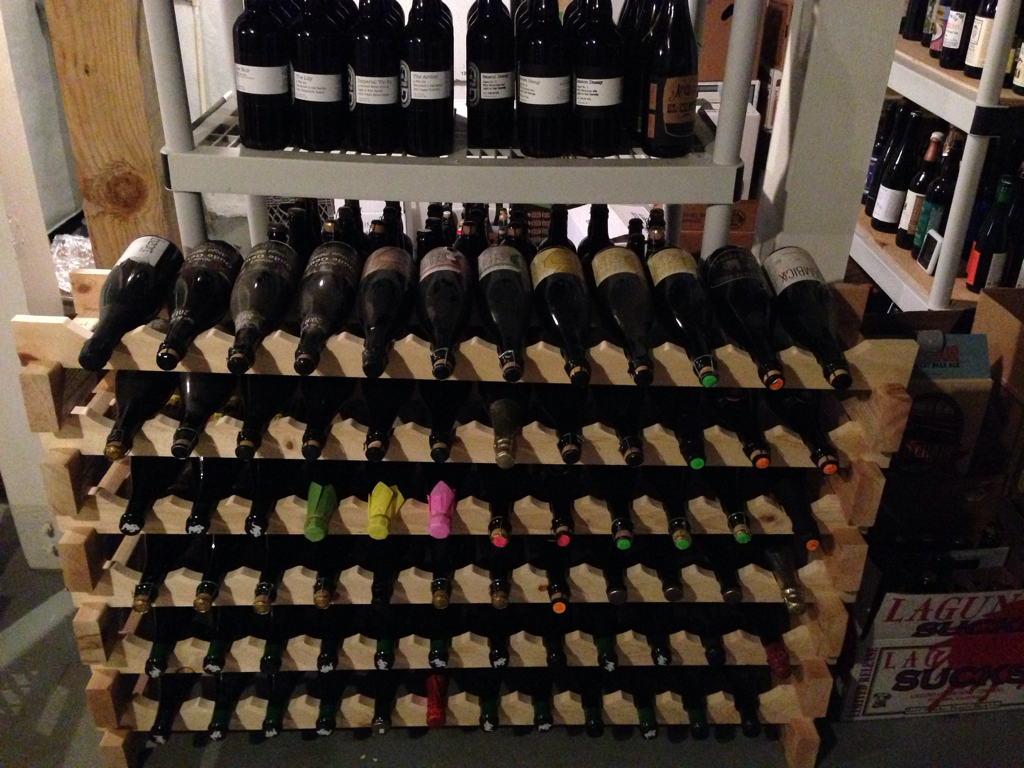
Second, here's what they look like finished:
iYzG9cjh.jpg


You can see the notches in the front, but the back is a little harder to see. Here's an image of my SolidWorks model cut halfway through the bottle (the bottle is based on a Cantillon bottle):
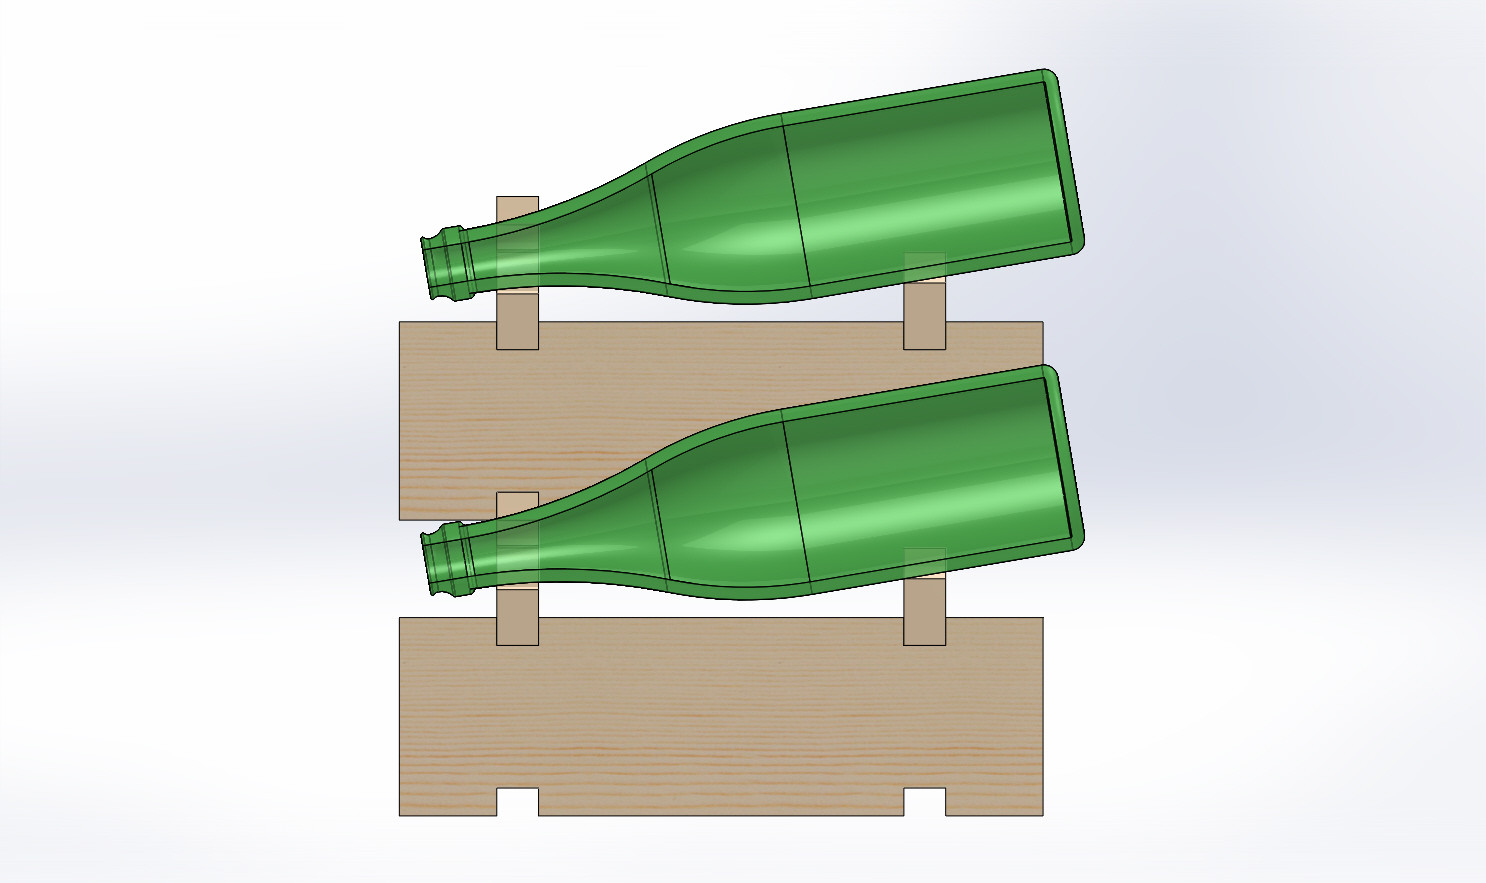
huIvBmR.jpg


I've been asked before why they slope down, and it's entirely due to the geometry of the thing. If you used wider pieces of wood you could modify that, at the cost of having fewer bottles per vertical unit of distance. I'm just fine with them sloping down.

Finally, here's the PDFs of the plans:
Separator
Rear Holder
Front Holder

Okay, so that's the background, let's get started with the actual advice on building.

Step 0: Build a jig:
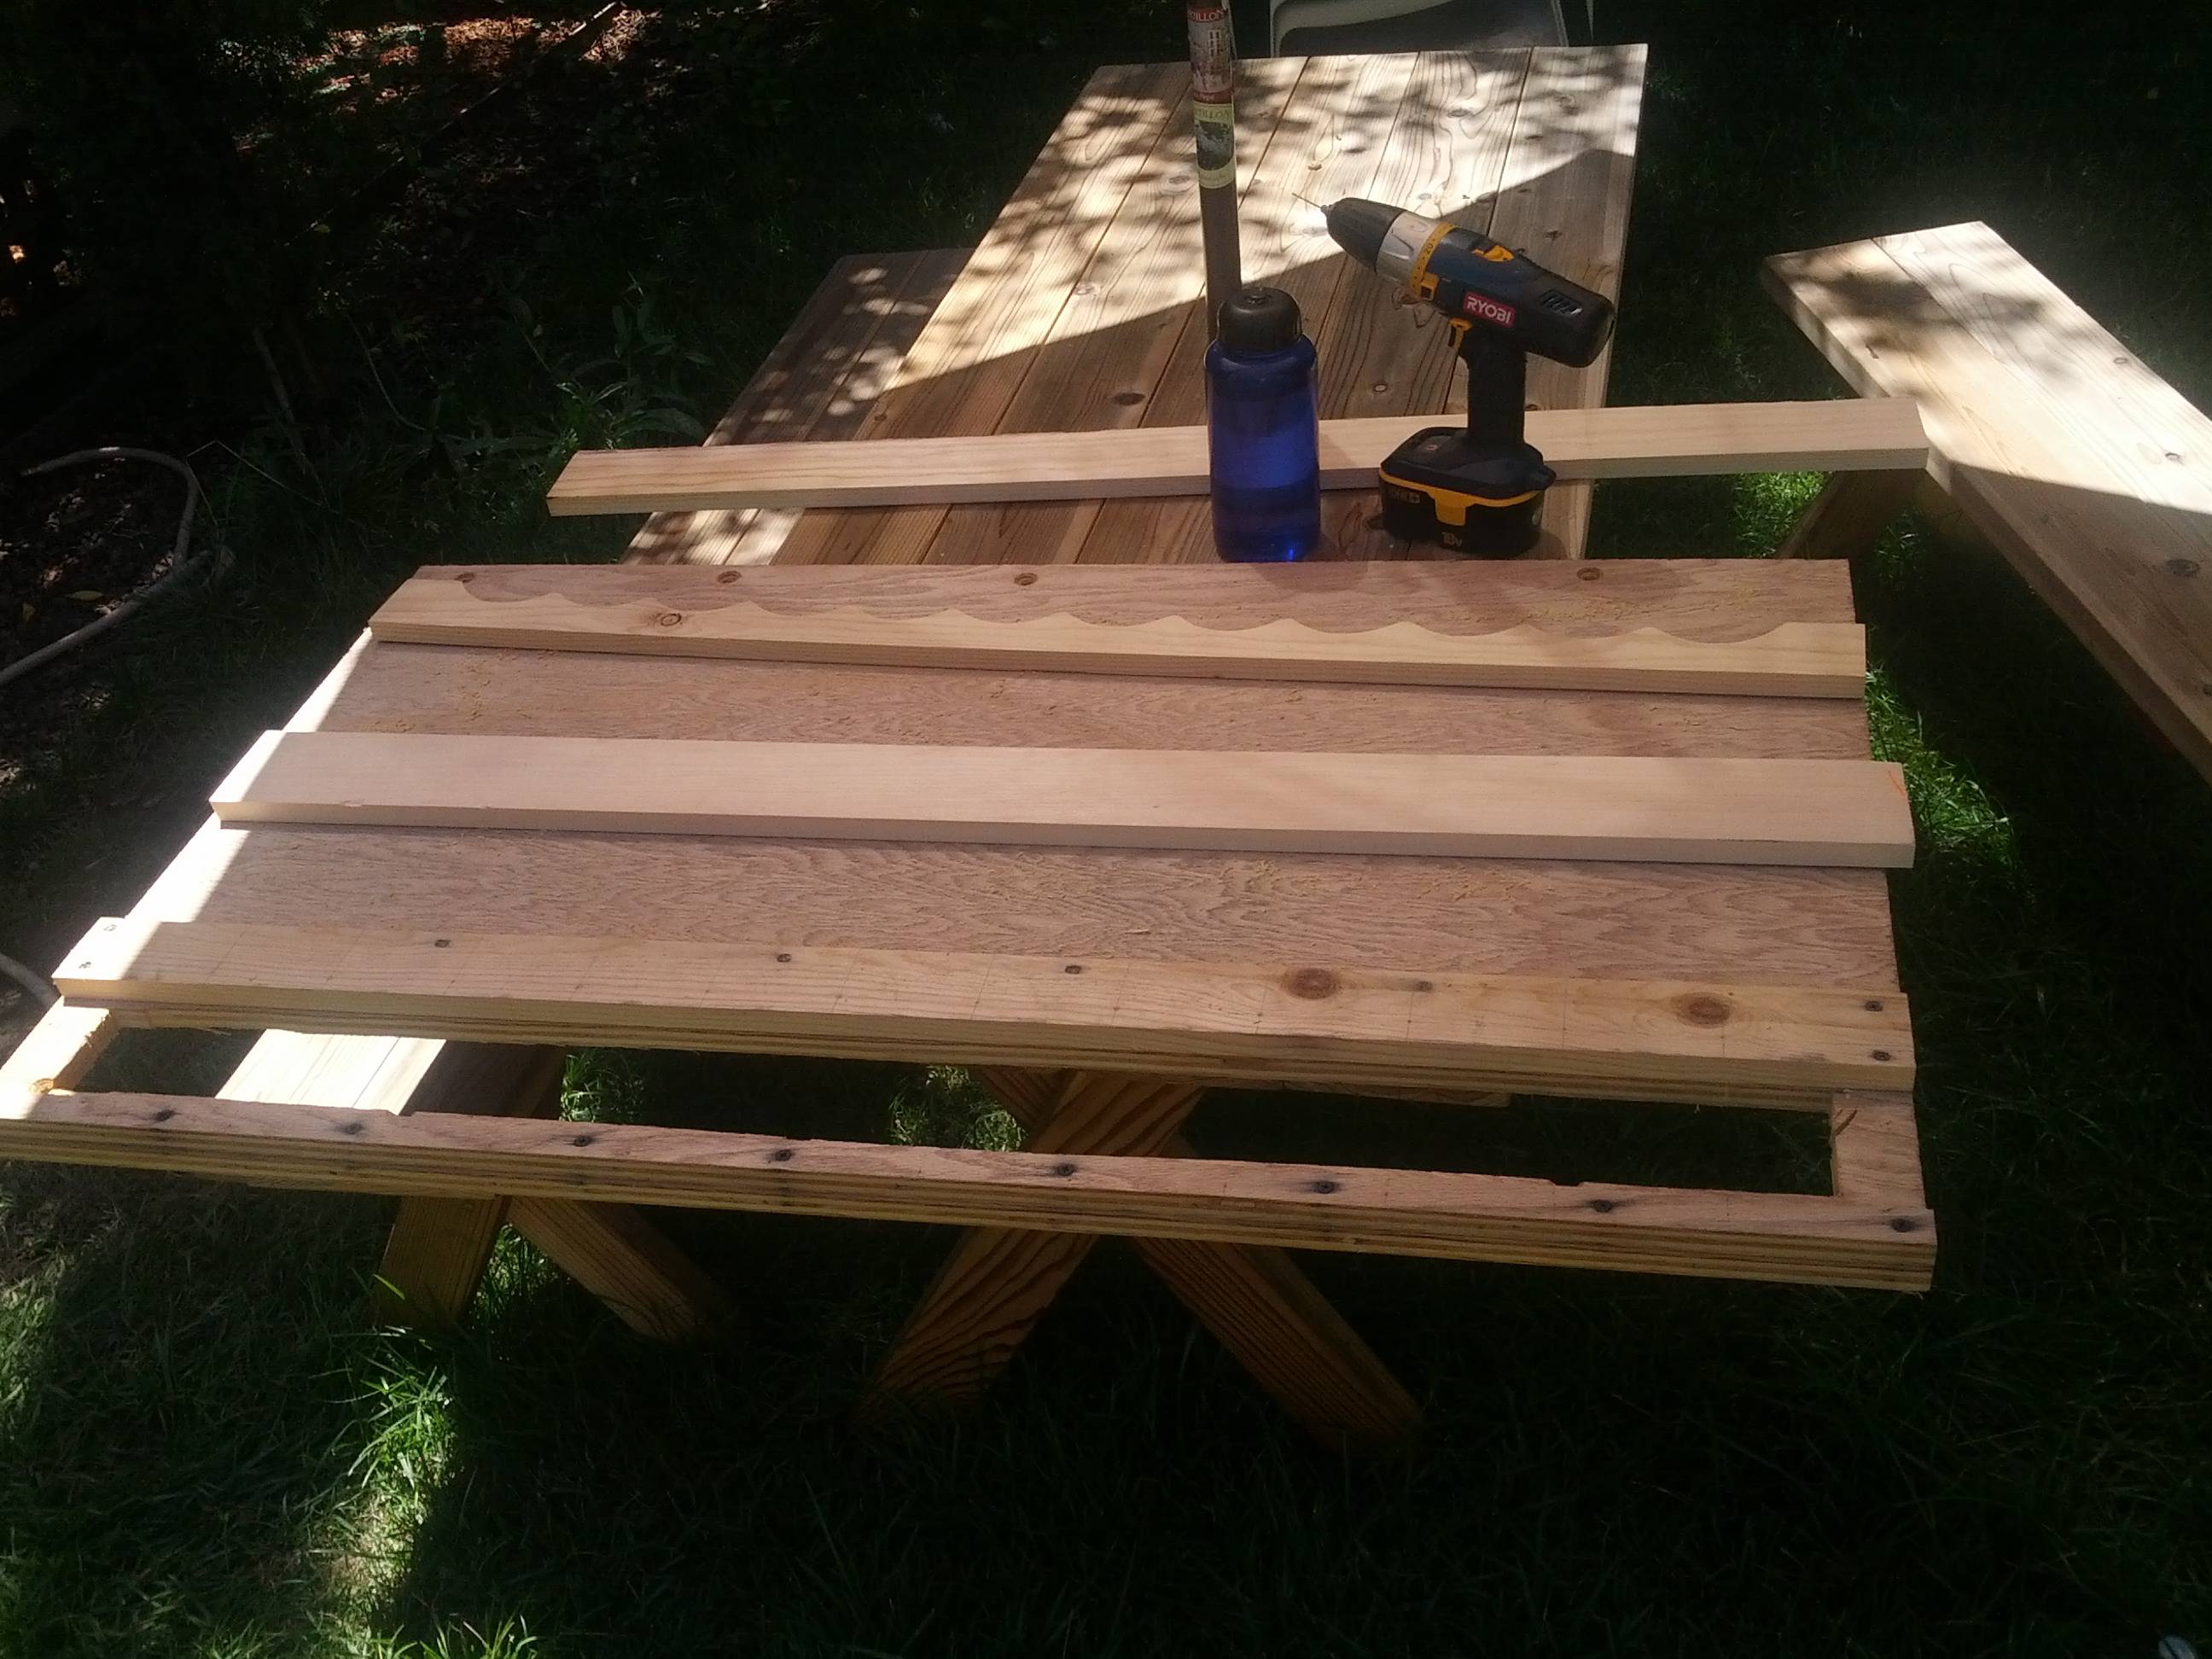
xmlN495.jpg


That's the jig I used. It's just a big, study piece of ply with a hole cut in it and a couple pieces of wood the same thickness screwed such that they can be used for various things. The one on the bottom serves to locate the piece you're cutting, the one on top is for keeping tools level (initially I had another plan for it but it didn't work, that piece isn't really necessary). If you're going to build up any kind of real capacity you'll need some kind of jig, because you'll be making a lot of these pieces. (I ended up making over 20, and using 16, some of the early ones were bad so they're not being used.)

Step 0.5: Acquire wood. The dimensions are in the PDFs, but for your sanity I'll note that I used 1"x4"x8' boards from Home Depot. Those end up coming out to 0.75" thick, which is the really important dimension since you can't modify it easily, and 3.5" wide, which is pretty much what you want. The length lets you get two 4' sections, just what you want (strictly speaking it's a tiny bit over but that's better anyway).

For the separators I did one of two things:
1) Bought some redwood from a lumberyard that fit the dimensions in the PDF somewhat well. The thickness isn't super important, though you don't want something as thin as a 2x4, but the height is somewhat important.
2) Bought extra from the craigslist woman I bought the other parts from. The first time I made them it went really poorly. If anyone has advice on how to make a square cut in wood without a drill press, let me know.

Step 1: Align the board and mark it up.
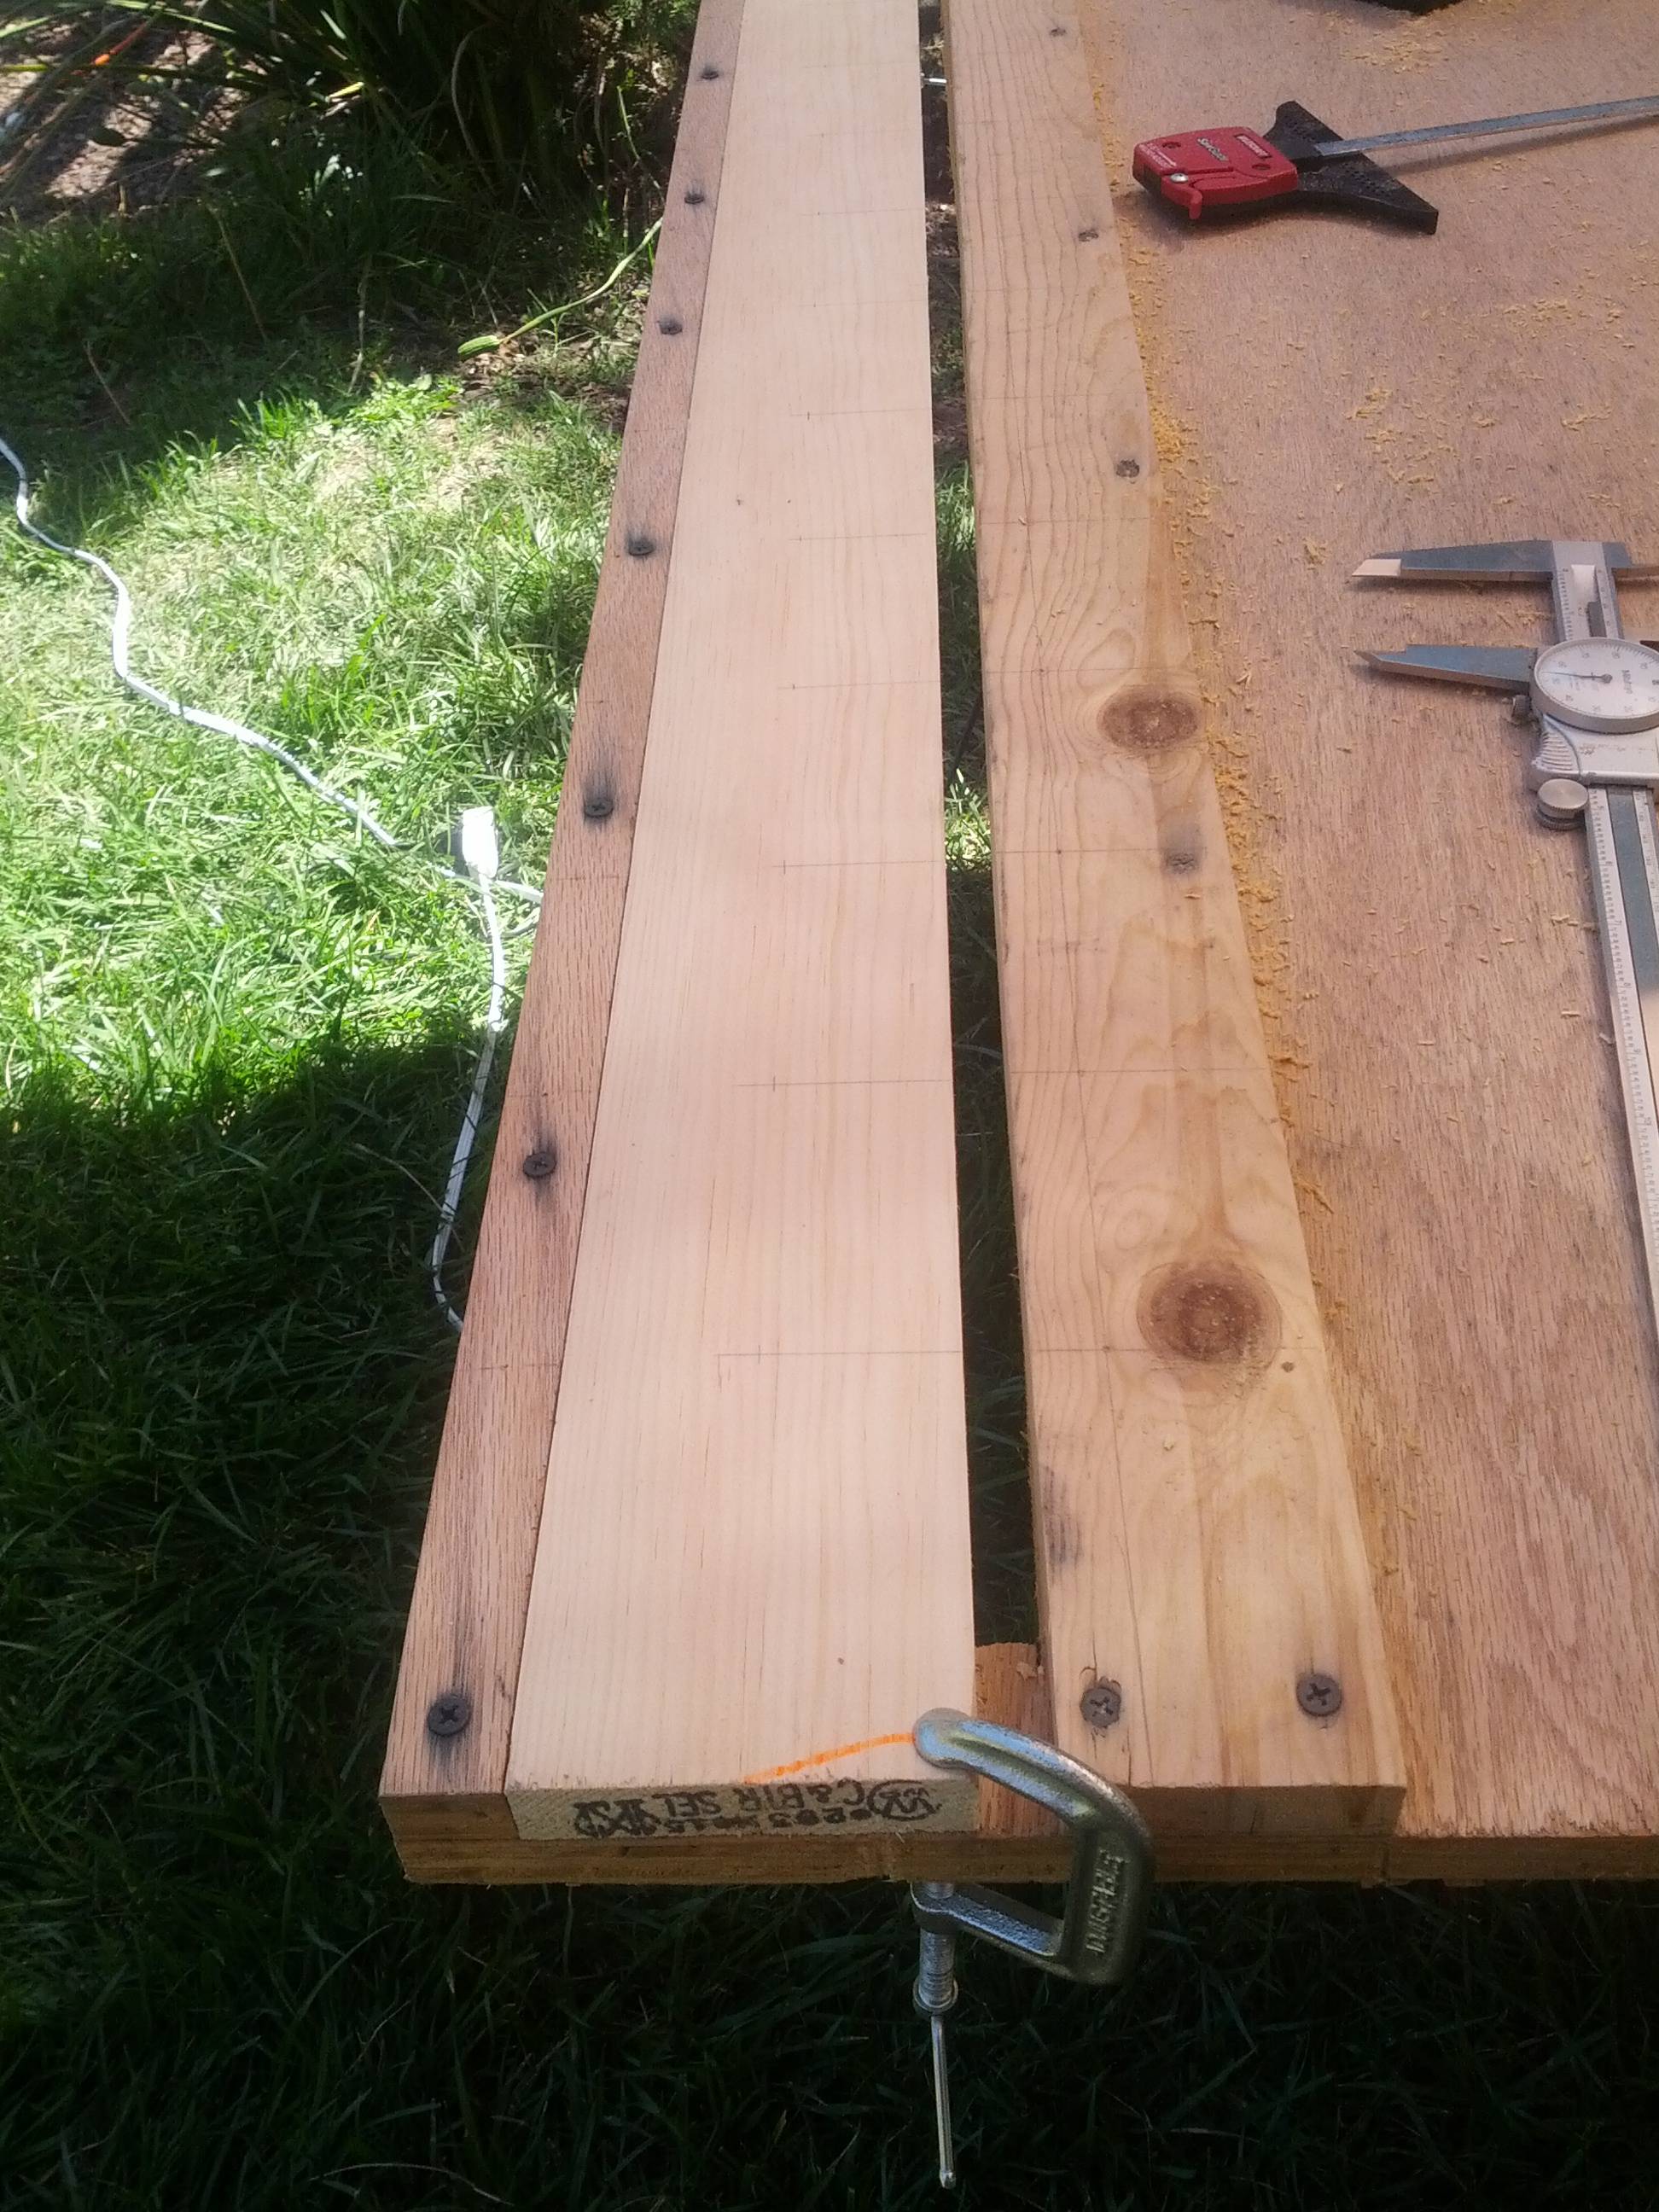
ZXtV5Sr.jpg


The markings on there are the spacing for where the holes will go. For the vertical lines I just used a t-square aligned to marks on the jig, so I didn't have to measure this out 800 times. The horizontal lines are just 0.75" up.
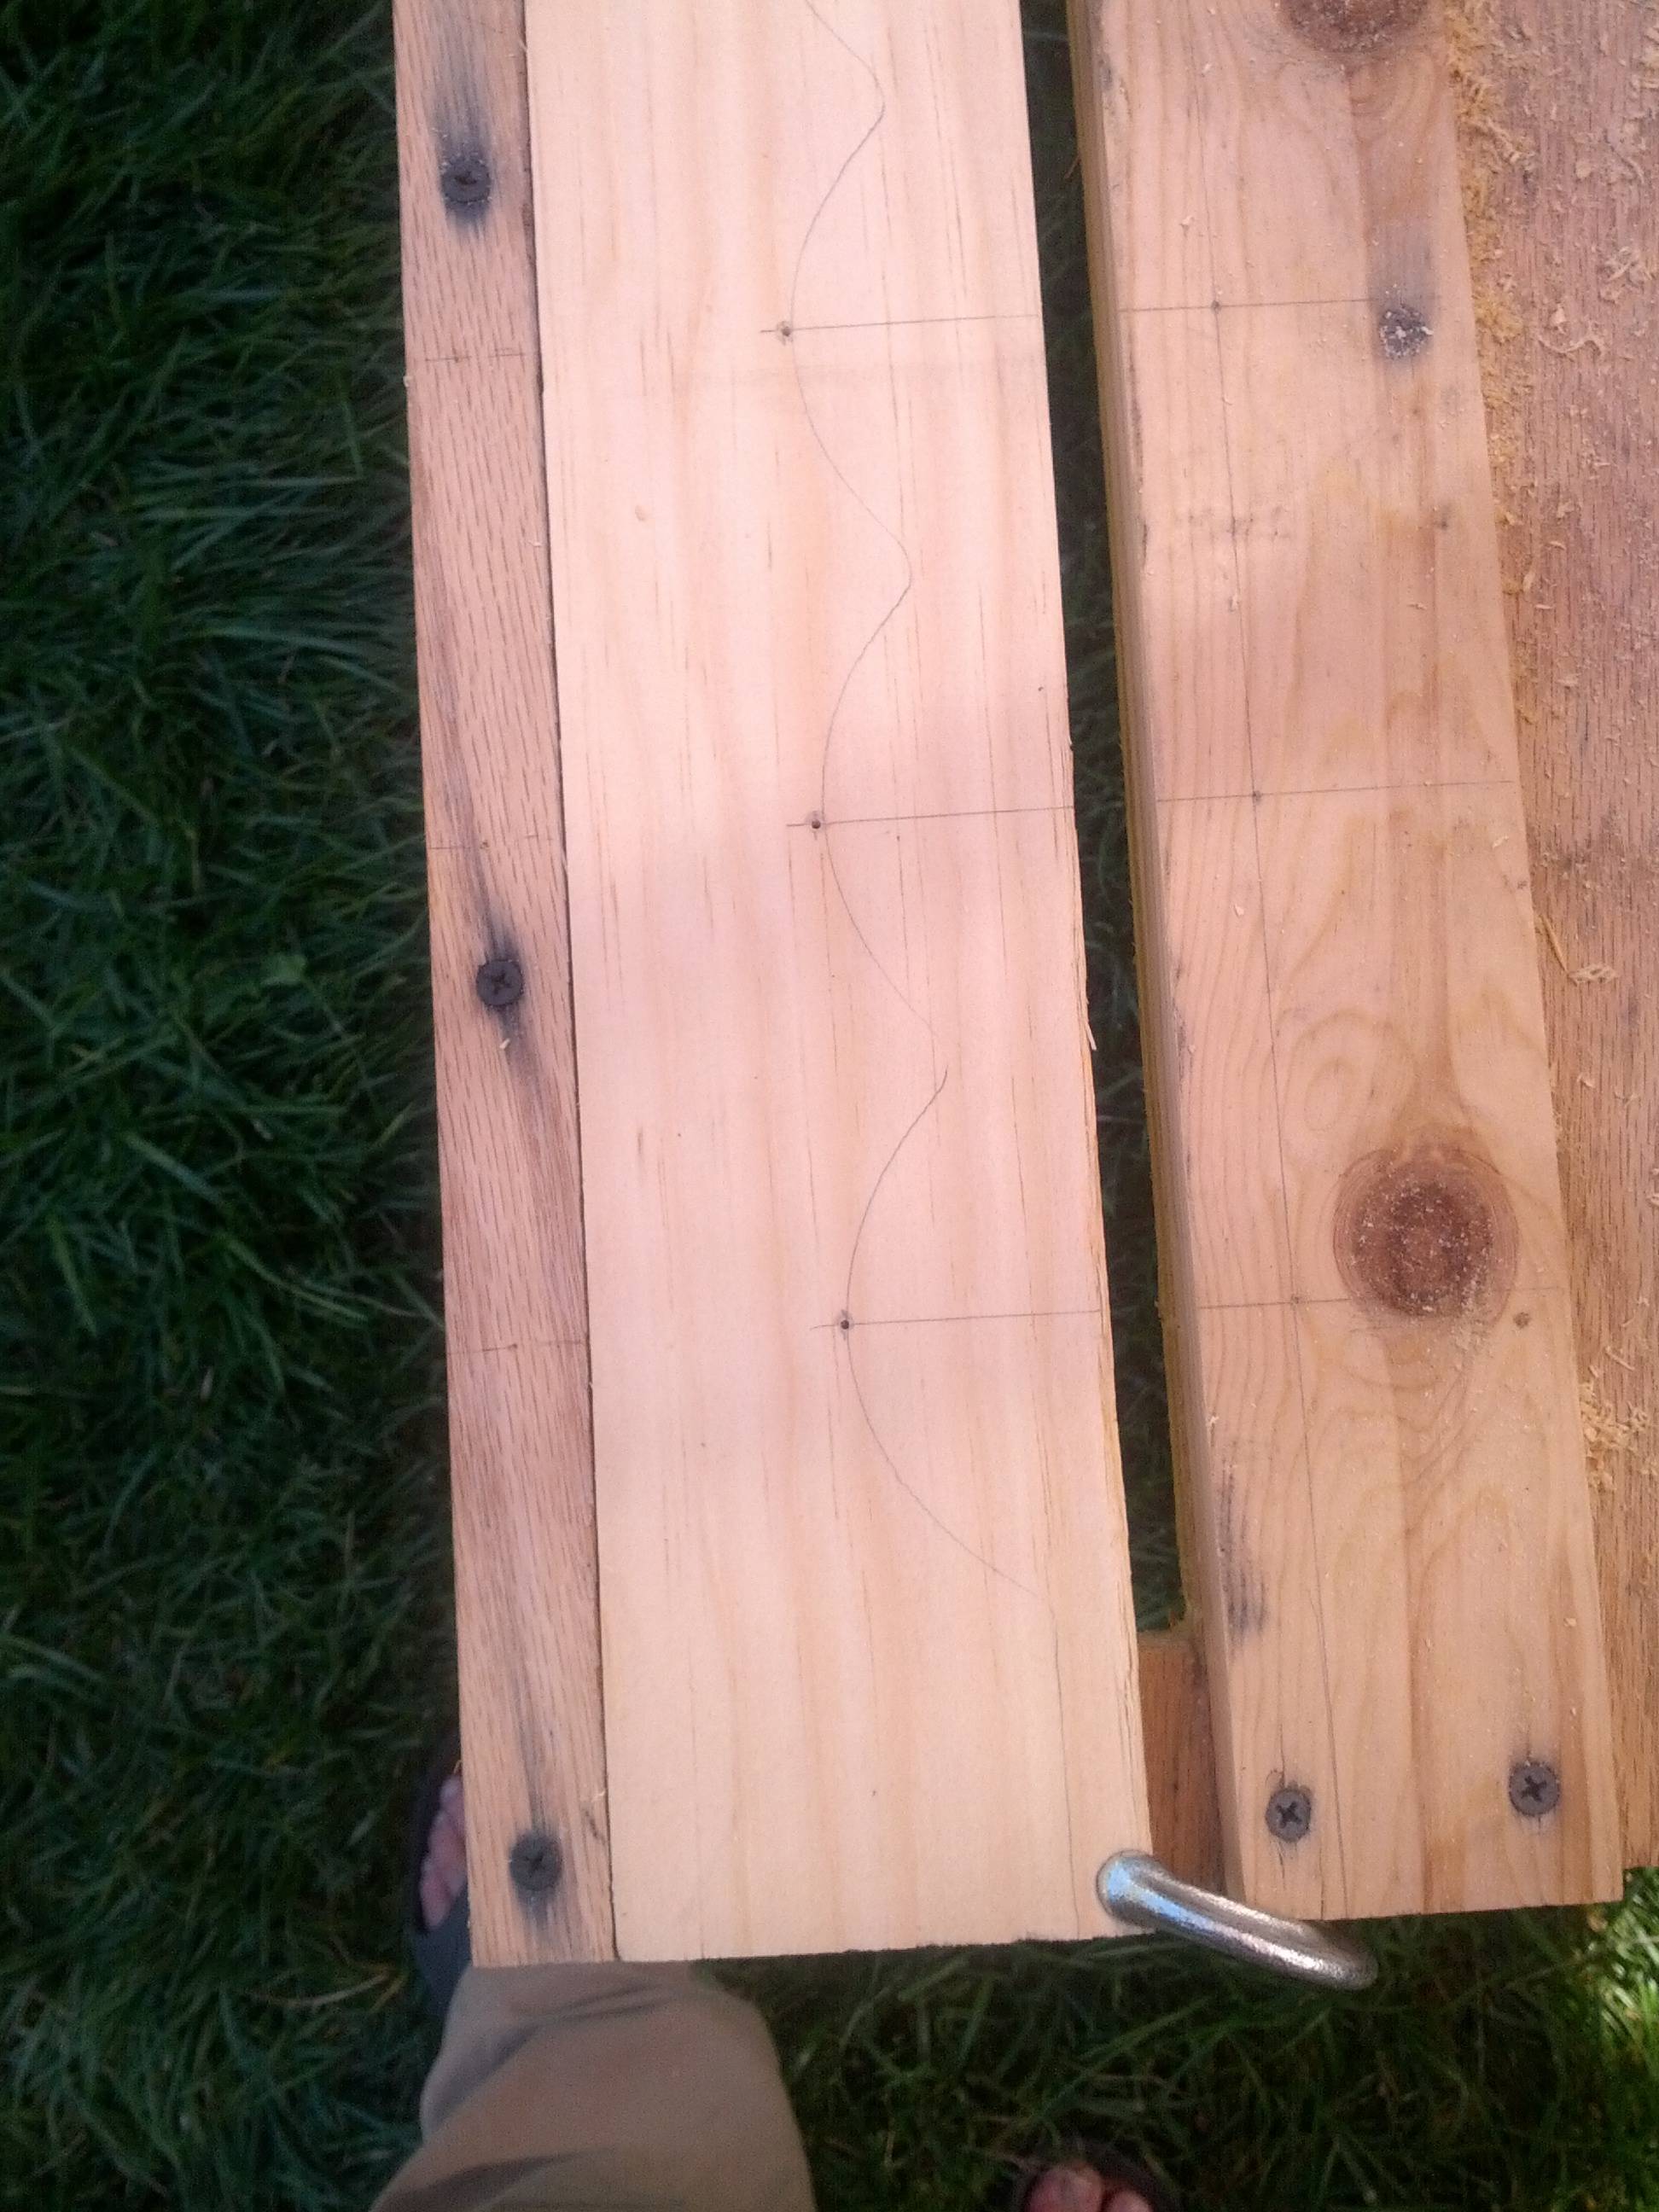
cQWTs0d.jpg


What I did here was take a rear holder (which, remember, I just bought, I didn't make any of them) and line it up so the bottom of its grooves touched the intersections of the lines from the first part of this step. Then I traced it. The first time you do this you could just mark out 6" circles, or whatever you want to do in order to get it right. But after the first one, I'd recommend tracing. Worked great. Here's an overview picture of the board all marked up:
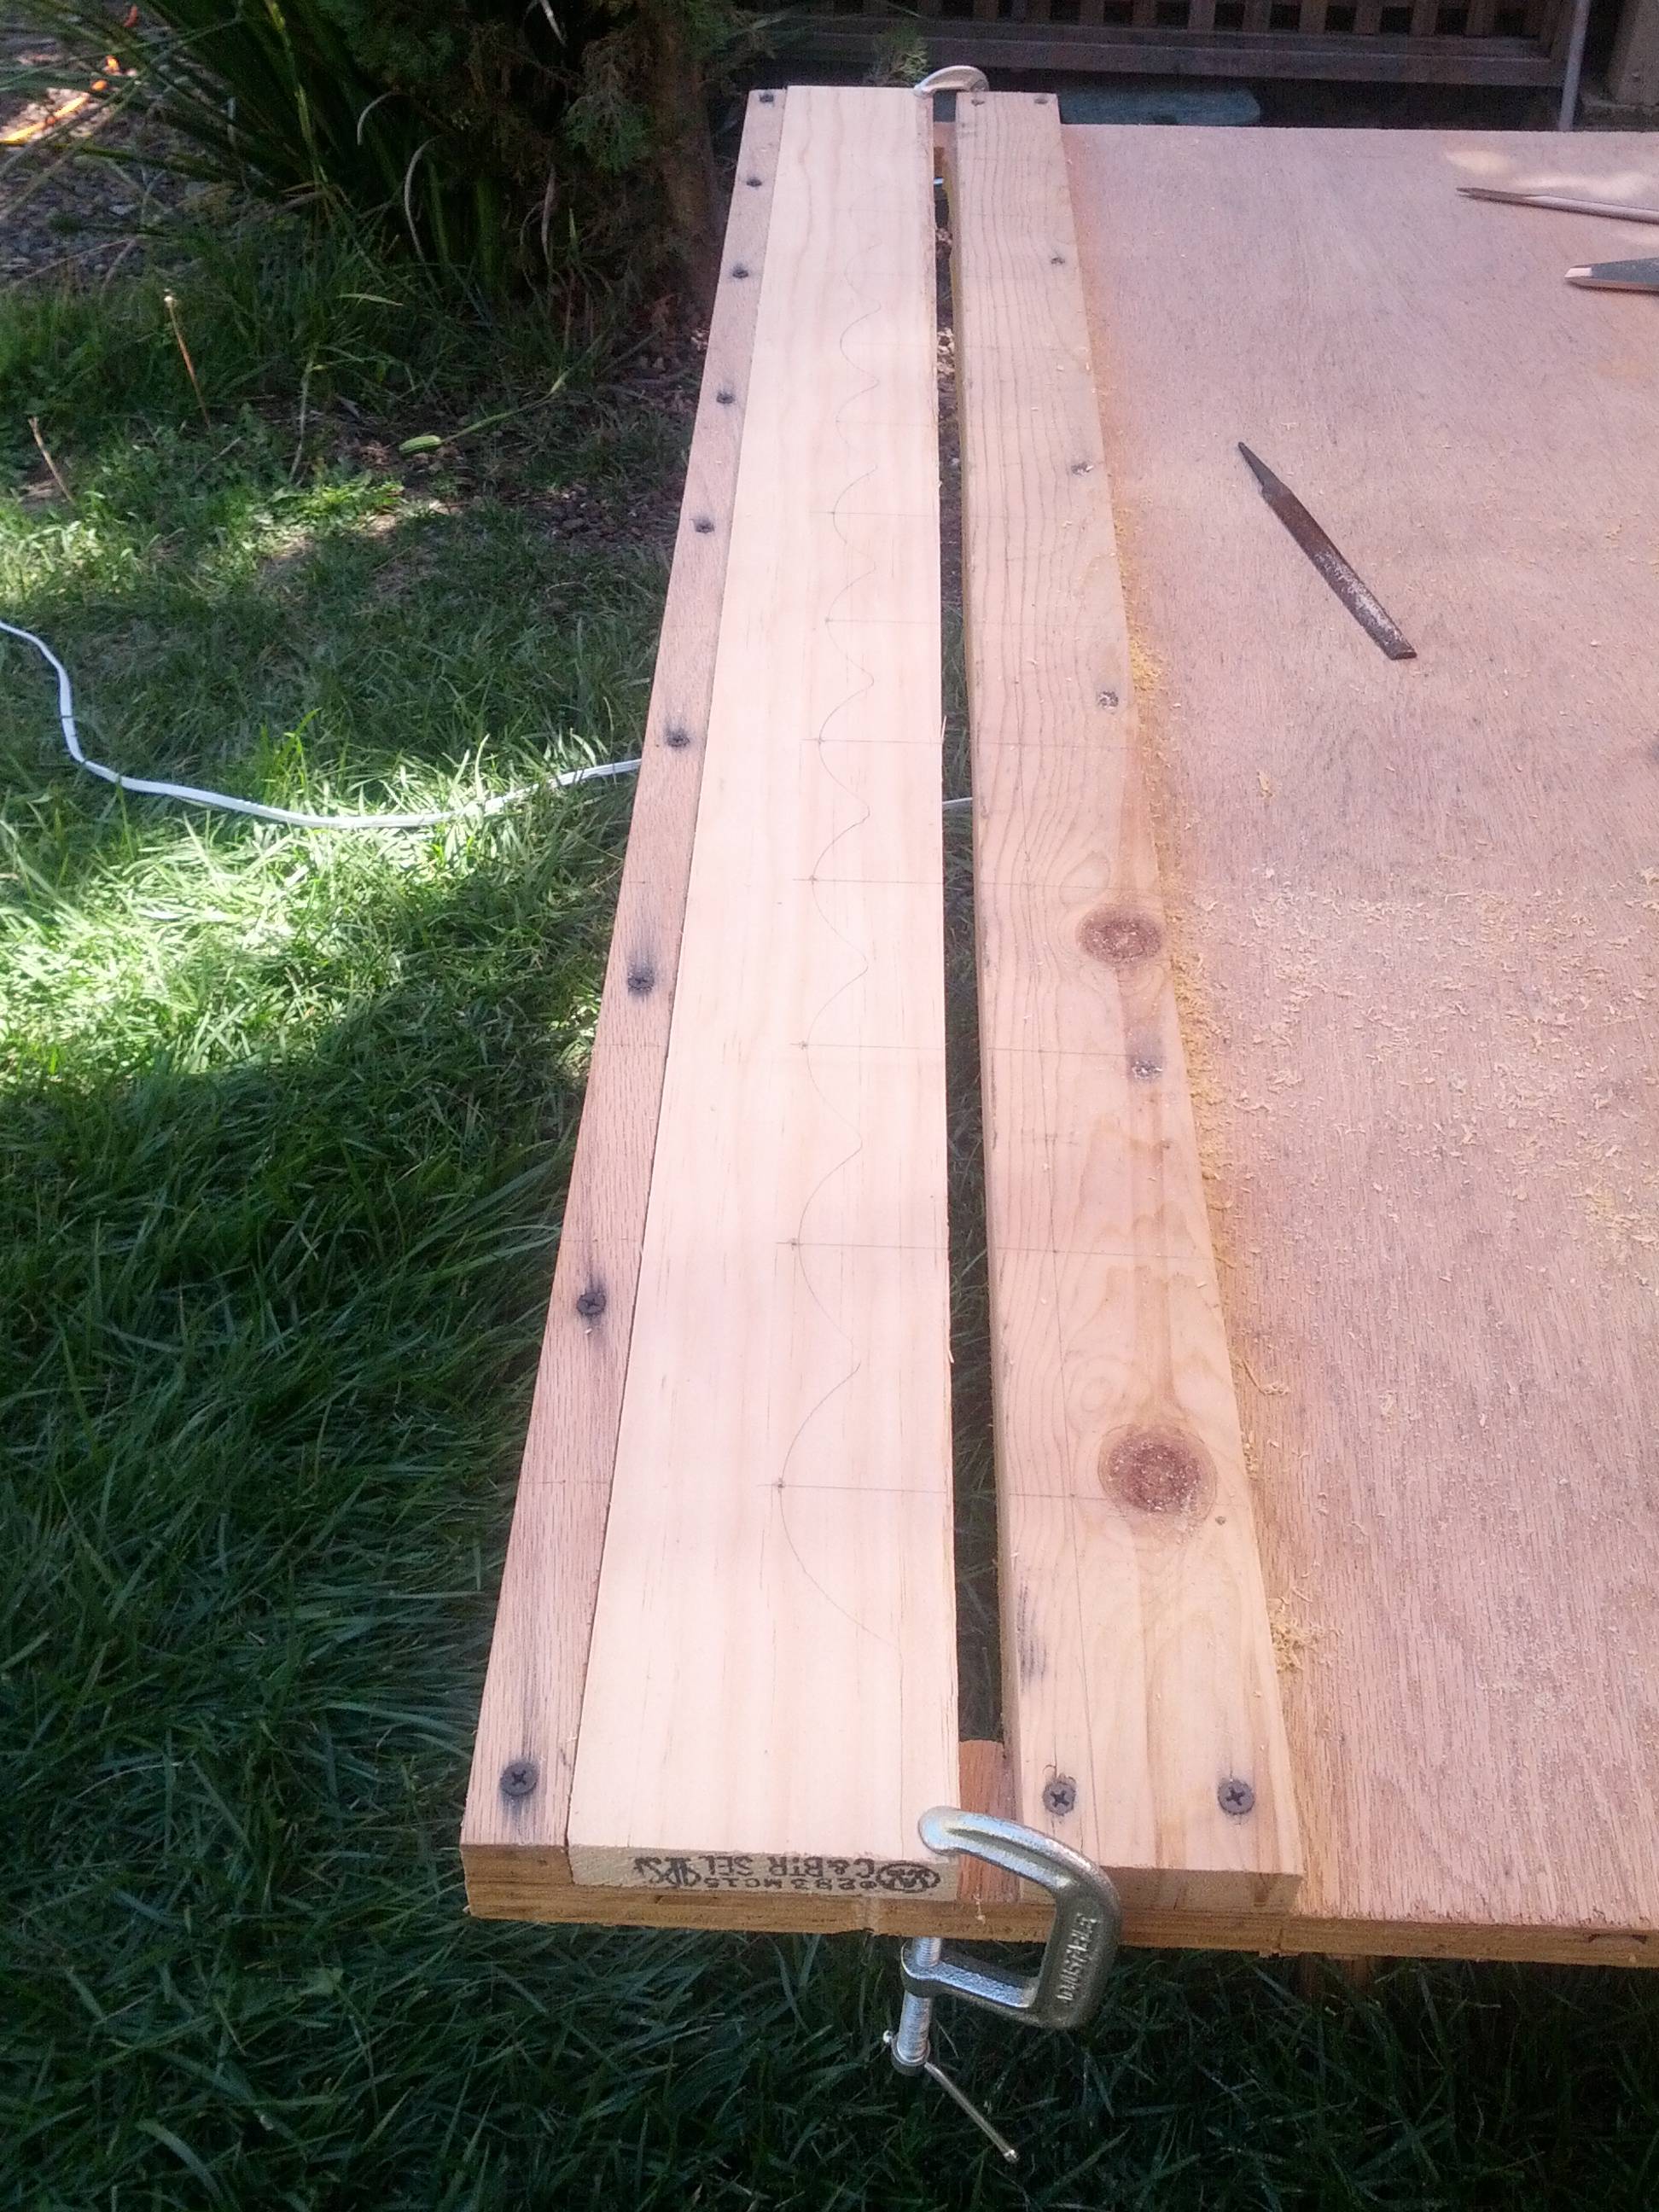
gSZtKLA.jpg


Step 2: Drill a bunch of holes.

49bgN4t.jpg


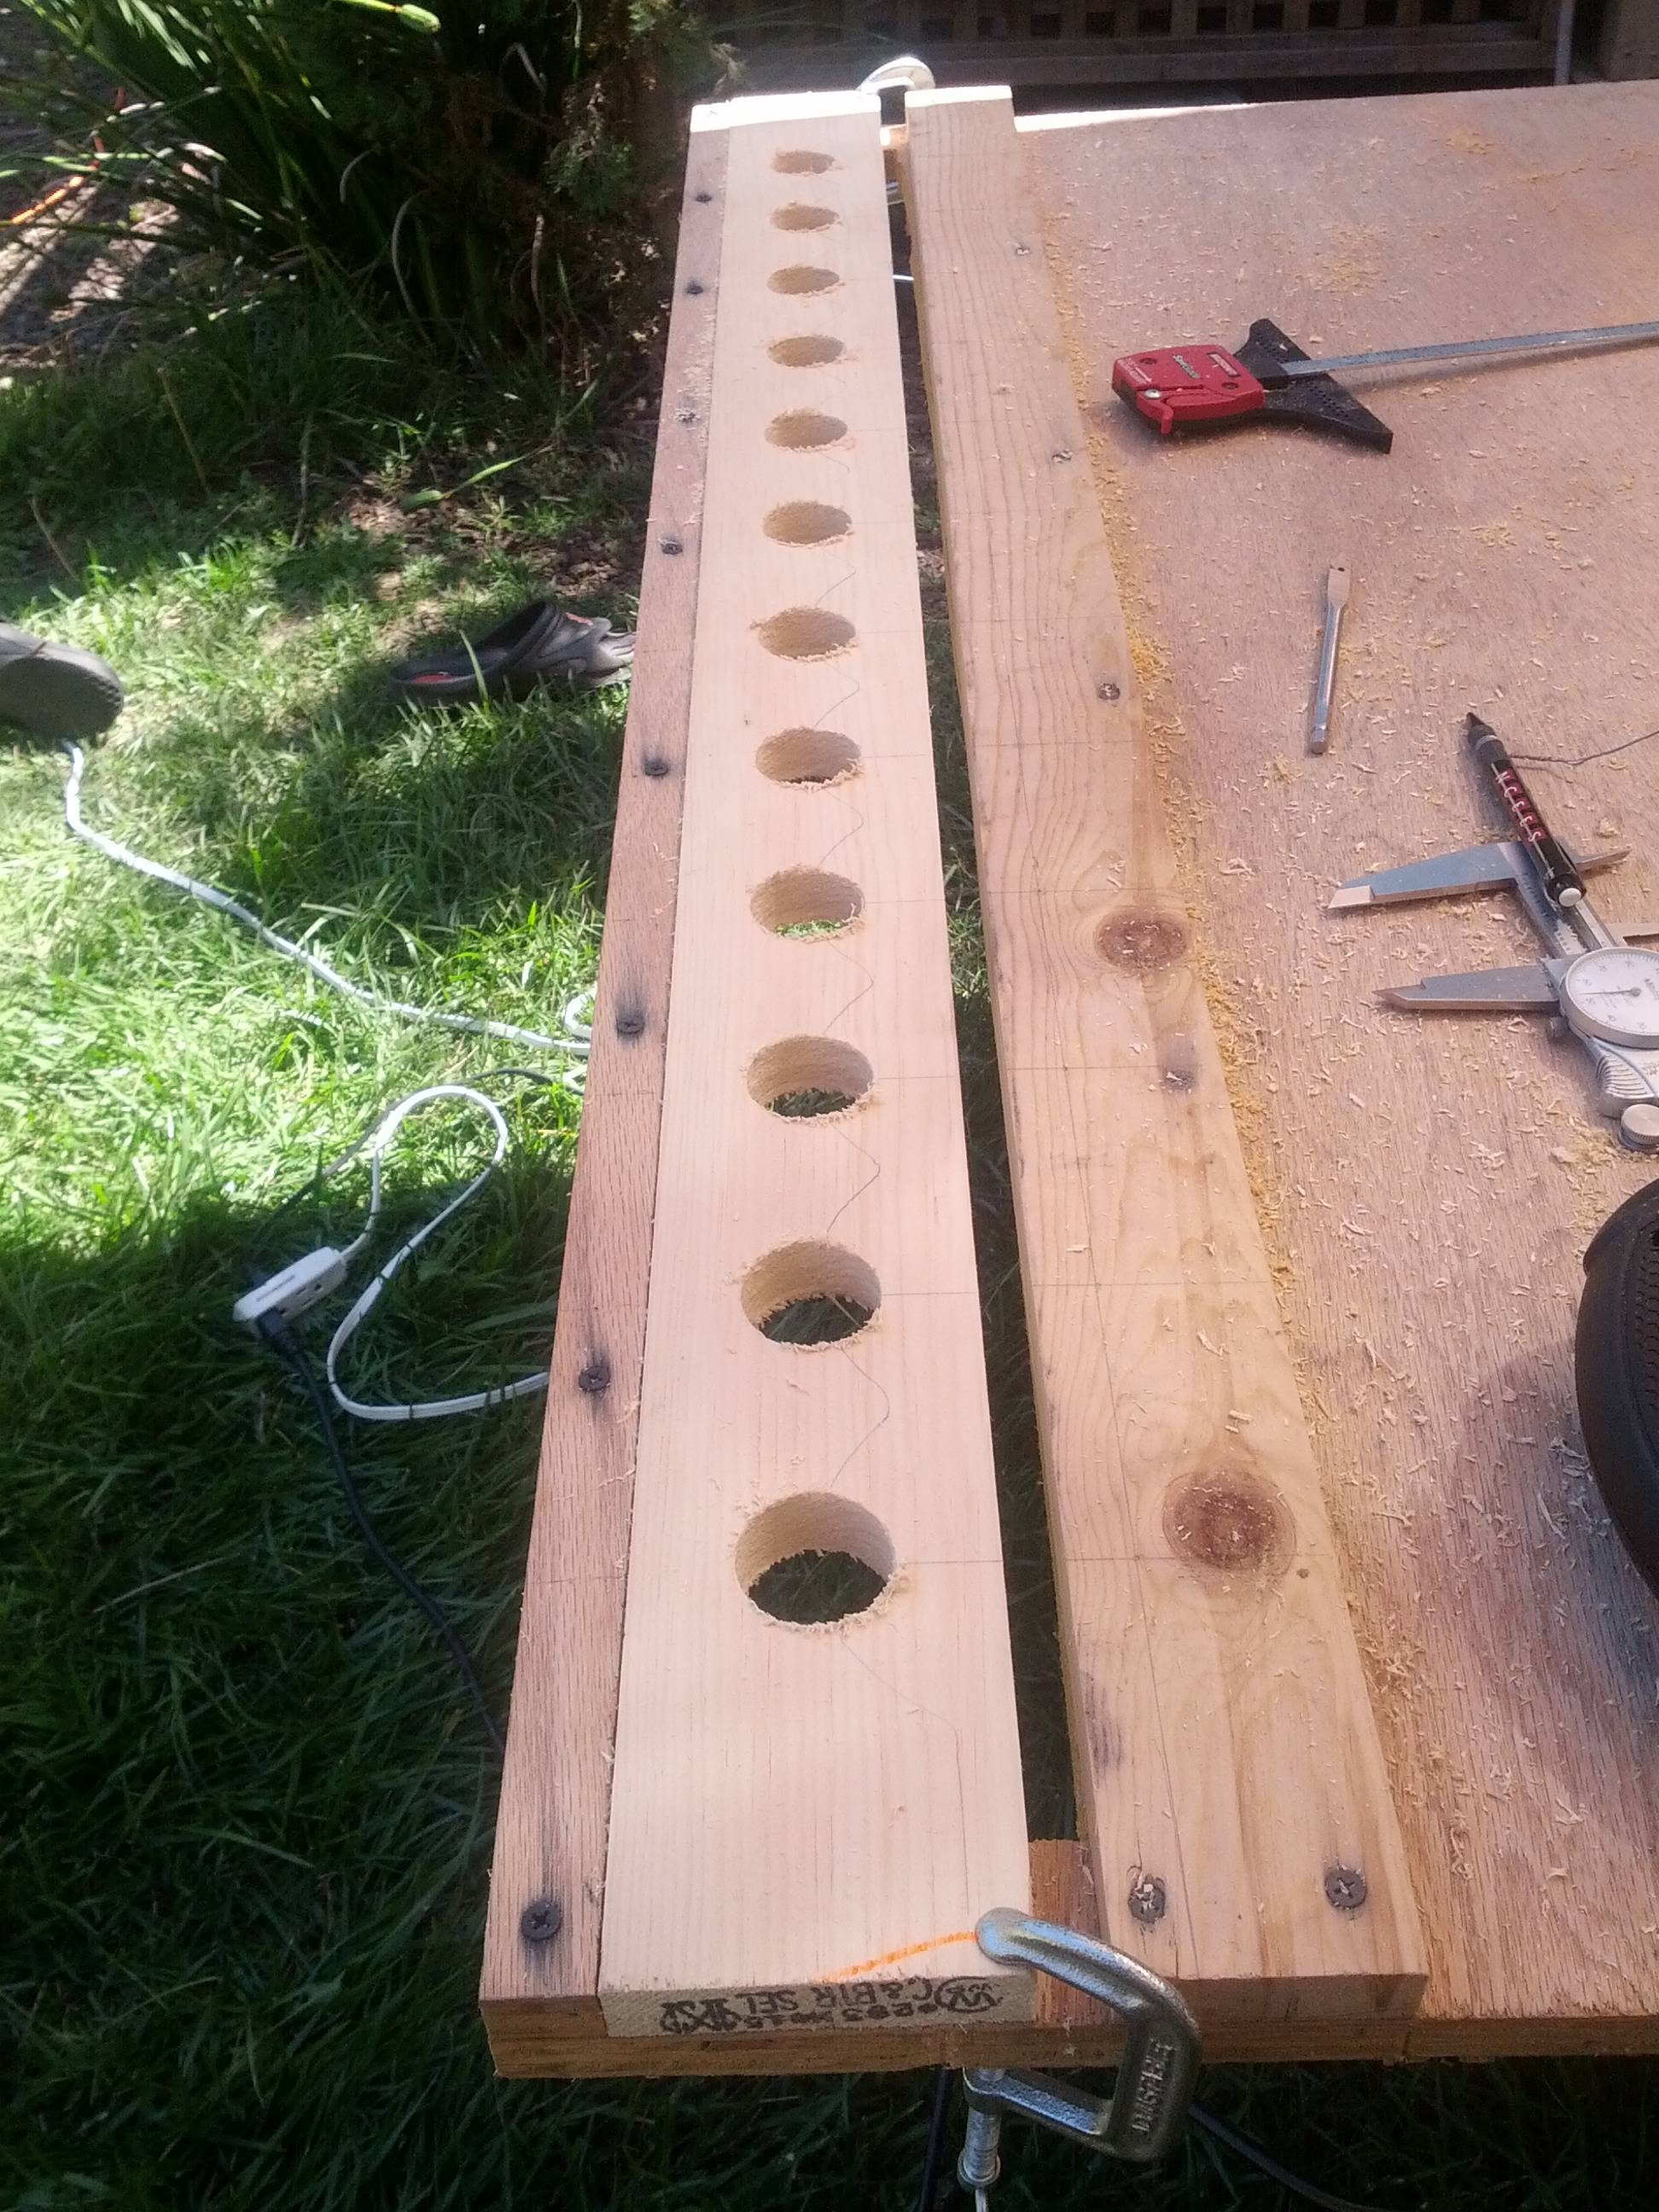
One 1.5" diameter hole at each of the marks, 12 total. Takes a while. Use a corded drill, unless you have 40 charged batteries on your cordless. Seriously, my batteries were lasting 6-8 holes. Pieces of ****, man.

Step 3: Jigsaw time.

Now use a jigsaw to cut along the lines you drew above. I don't have any pictures of this because I'm dumb, but what I did was started at one side and cut all the lines going in one direction, then reversed course and cut the other ones. At the end it fell off and you're almost done!

Step 4: Cut off the edges.

You should have to modify the edges a bit, since the wood is wider and longer than you want. That part is really easy and shouldn't need any explanation.

Step 5: Sand/file the thing.

My least favorite part, but it's necessary. If you have children I highly encourage having them do this, preferably while you drink beer.

The instructions for the rear holder will be similar, except without the holes and with the curves being drawn a bit farther down. Otherwise it's just a big fun jigsaw time.

Finally, I already mentioned that I sucked ass at making the separators. I did the thing where you saw it repeatedly with a circular saw, but that sucked and didn't work well, probably because my saw guide was ass for that job. If anyone has a better method let me know.
 
Nice carpentry. Do you happen to have any bottles stored a little more vertical? I don't subscribe to the old school wine method.
 
I did the thing where you saw it repeatedly with a circular saw, but that sucked and didn't work well, probably because my saw guide was ass for that job. If anyone has a better method let me know.

If working with wood is kind of a hobby for you and you have some space you should invest in a fold up table saw that will accept a dado blade or a router table and use a straight bit in it. Both of those options cost some dolla dolla bills yall but totally worth it if you do a couple projects a year.

If you went with the router you wouldn't necessarily need a table. You could clamp all the pieces together and use a straight edge.
 
Nice carpentry. Do you happen to have any bottles stored a little more vertical? I don't subscribe to the old school wine method.
I do in my temperature-controlled fridge, but that's just a wine fridge with the racks taken out (it holds more bottles vertically). But vertical storage is generally really easy, just go to the store and buy a shelving unit that fits your space. I like horizontal better because I have equal access to all the beers, and I think it made more sense in my space. I'm also not a big believer in any particular orientation, as seen in the cellaring FAQ.
If working with wood is kind of a hobby for you and you have some space you should invest in a fold up table saw that will accept a dado blade or a router table and use a straight bit in it. Both of those options cost some dolla dolla bills yall but totally worth it if you do a couple projects a year.

If you went with the router you wouldn't necessarily need a table. You could clamp all the pieces together and use a straight edge.
Yeah, I know there are better options out there, but I don't really have the space for those kind of tools, and I definitely don't do enough woodworking to justify it.
 
Tl;dr. What is going to cost me for you to make three full racks and have them shipped to Indiana?

As witnessed in the Upland fiasco and many, many times over, I have WAY more money than sense.


Also, jk, did read and will read again.....naked.....with lotion.
 
Tl;dr. What is going to cost me for you to make three full racks and have them shipped to Indiana?
I actually have sets of drawings that can be uploaded to a 3D-printing house that also does some CNC fabrication, but it ended up being too expensive to justify (though if anyone's interested I could look at it again). However, if you know someone with any kind of CNC and could use the machine for just materials cost, let me know and I'll upload the thing.

I also looked into having a lambic basket 3D printed but that was ludicrously expensive.
 
You should really be wearing boots or at least sneakers if your working with power tools (Reported). But those are some sweat racks and I might build some for my growing lambic cellar. Or at least something similar that I can put on the shelves I built before deciding I should be storing the lambics horizontally.
 
I've been asked before why they slope down, and it's entirely due to the geometry of the thing. If you used wider pieces of wood you could modify that, at the cost of having fewer bottles per vertical unit of distance. I'm just fine with them sloping down.

As a heads up to anyone that builds racks with bottles facing downwards, please make sure you have a relatively stable temperature environment. As the beer warms, the volume of gas inside the bottle will expand. If the bottle is tilted downward, the gas expansion *may* force beer out along the outside of the cork--undermining the integrity of the cork's seal. Given this possibility, bottles are better stored horizontally, and even better stored at a very gentle upward incline. That way, should some gas expansion occur, the integrity of cork's seal will be less disturbed. Also, downward storage will cause sediment to form on both the cork and the neck--causing sediment to more easily be unintentionally poured into your glass.
 
As a heads up to anyone that builds racks with bottles facing downwards, please make sure you have a relatively stable temperature environment. As the beer warms, the volume of gas inside the bottle will expand. If the bottle is tilted downward, the gas expansion *may* force beer out along the outside of the cork--undermining the integrity of the cork's seal. Given this possibility, bottles are better stored horizontally, and even better stored at a very gentle upward incline. That way, should some gas expansion occur, the integrity of cork's seal will be less disturbed. Also, downward storage will cause sediment to form on both the cork and the neck--causing sediment to more easily be unintentionally poured into your glass.
A few things, is that force difference really that big of a deal? I get that it could happen, but the force difference due to gravity is going to be the difference in the sines of the angles, which should be pretty small here since we're dealing with small angles off horizontal. I'd guess the acceleration due to gravity differential is something like ~1/10 the total force of gravity, which is going to be a tiny actual force on a cork, especially compared to the 10's of PSIs in the bottle.

Let's actually look at this somewhat more concretely. A cork's surface area is probably something like 1/2 in^2, assuming 10 PSI inside (which isn't even 1 atm, so I'm betting it's really more) you have ~20N, whereas if the cork weighs 50g and I'm right about the 1/10 force of gravity, you're talking about 0.05N due to gravity. I'd have to be wrong by several orders of magnitude for this force to be significant compared to the pressure inside the bottle. Possible, but unlikely (I did do all of this in my head, except the unit conversion from lbs to Newtons because I don't have that memorized).

Second, while a big enough angle could certainly collect sediment around the cork/cap, this angle isn't steep enough to do so. Sediment collects on the side as you expect, although it's likely somewhat farther up the neck than in horizontal/angled upward storage.
 
I am not the greatest physicist, but I think you are over thinking it (or I am retarded). The air bubble will always be trapped at the highest point in the bottle. If the bottle is tilted downwards, the air bubble will be trapped between the beer and the glass bottom. As the air bubble expands, the air has nowhere to go but to try and displace the beer, which means the expanding gas will push the beer down against the cork, potentially forcing it out the sides of the cork. If a bottle is tilted upwards, as the air bubble expands it will attempt to displace the beer (which has nowhere to go) and will thus also push against the cork, potentially causing air to seap out. While both are not good (which is part of why maintaining constant temperature is key), seaping gas is better than seaping liquid interms of maintaining a seal.
 
I am not the greatest physicist, but I think you are over thinking it (or I am retarded). The air bubble will always be trapped at the highest point in the bottle. If the bottle is tilted downwards, the air bubble will be trapped between the beer and the glass bottom. As the air bubble expands, the air has nowhere to go but to try and displace the beer, which means the expanding gas will push the beer down against the cork, potentially forcing it out the sides of the cork. If a bottle is tilted upwards, as the air bubble expands it will attempt to displace the beer (which has nowhere to go) and will thus also push against the cork, potentially causing air to seap out. While both are not good (which is part of why maintaining constant temperature is key), seaping gas is better than seaping liquid interms of maintaining a seal.
Oh I see what you mean. I think I was confused by saying that something was expanding, since the gas is constrained to a given volume the temperature increase is only increasing the pressure (which is your point, but I think enumerating those steps lost me since I'd skip them, oddly). Interestingly, to me at least, we can calculate this. If you assume that storage fluctuates between 55 and 75, and using the ideal gas law (probably good enough here since the gas is just CO2 at ~STP, and it says that with a constant volume P/T is constant) that 20F increase increases the pressure inside the bottle by 4%. Not very much! It could be a factor, but I think that any leakage that would occur at 75 would've occurred anyway at 55, though a system where that 4% difference goes over a tipping point is certainly possible to envision.

You're definitely right that if the seal is compromised you're more likely to get a gas than a liquid leak with an upright bottle, but I'm not sure it's that simple. I've seen a lot of crud on bottles that were probably upright for their whole life (for example CCK purchased right from Toronado, not sure why it would've ever been on its side). But the dynamics of fluids and seals is very far outside of my wheelhouse, so I don't know why that would happen.

Anyway, long way of saying that, yes, if you're worried about leaks it's better to store with the gas on top. I'm personally not very worried, as I think that a leak that "only" lets out gas is still going to ruin the beer if it lets out enough, same with the liquid (I may be wrong here, I've never actually had either happen in storage, another reason I'm not worried: this seems pretty rare).
 
Having built a set of racks from the plans, some thoughts, comments, suggestions for folks considering it.

First, it's very subtle in the plans, but the curves on the front and back pieces are not identical. Initially I thought they were and made all the pieces based on the front measurements. If you do this, the rear will not have enough space for the base of the bottles. So, look closely. Fortunately, once I realized my mistake it was easy to trim the rears down more.

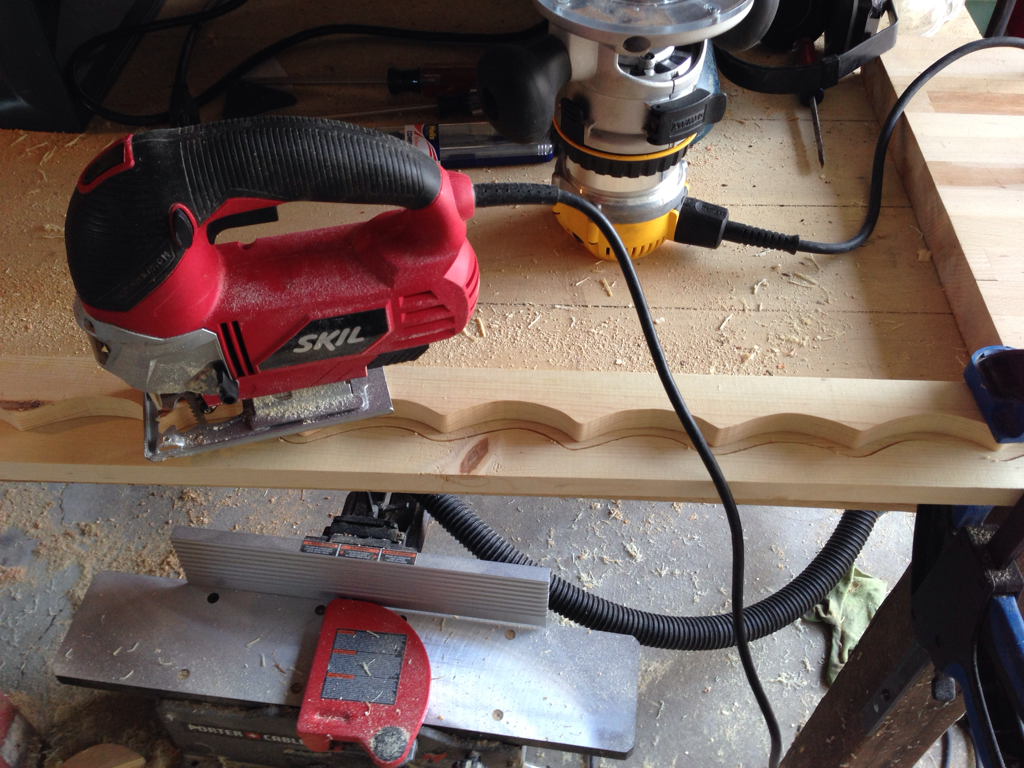
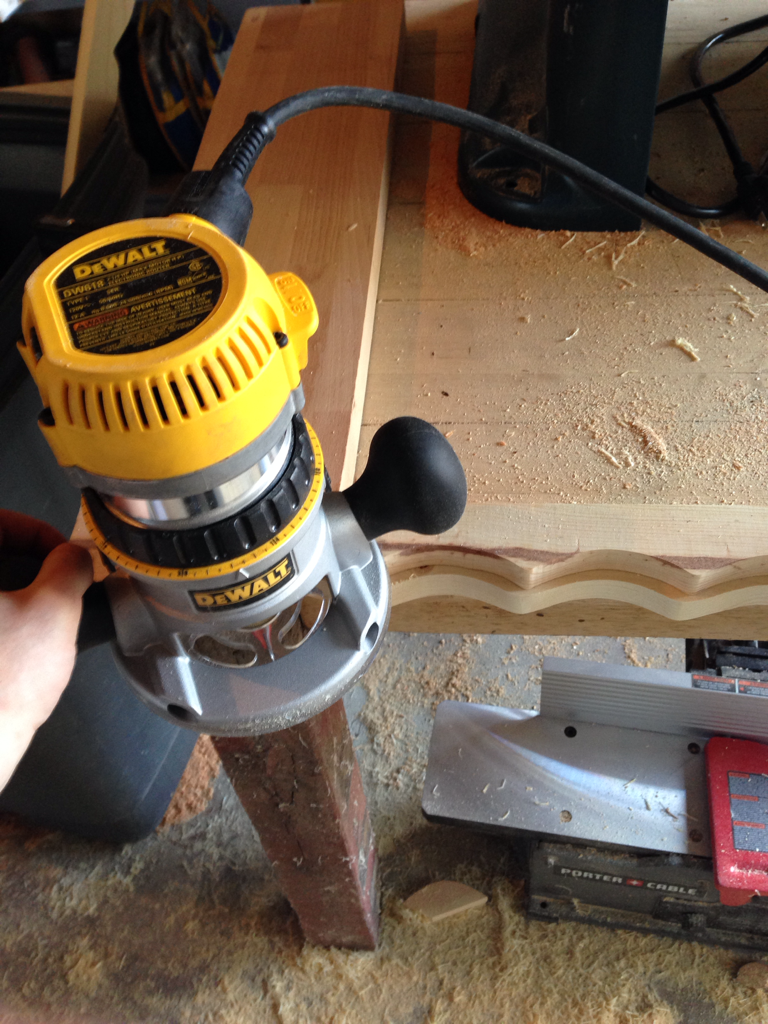
Second, I started out with the tools Stu describes and it sucked. Maybe he's got a better drill and jigsaw than me, or more patience, or better technique, but my results were pretty janky. As has already been mentioned, a router will make this much easier. I took my best freehand pieces and used them as a router template for the rest. Photo demonstration:

First, clamp the template on top of a new board and use a jigsaw to remove most of the material

TzXL6M4.png


Then, come back across with a router w/ guide bushing

5BmO2vd.png

zjX37Db.png


The result is much more consistent, much faster, and as an added bonus, doesn't really need to be sanded.

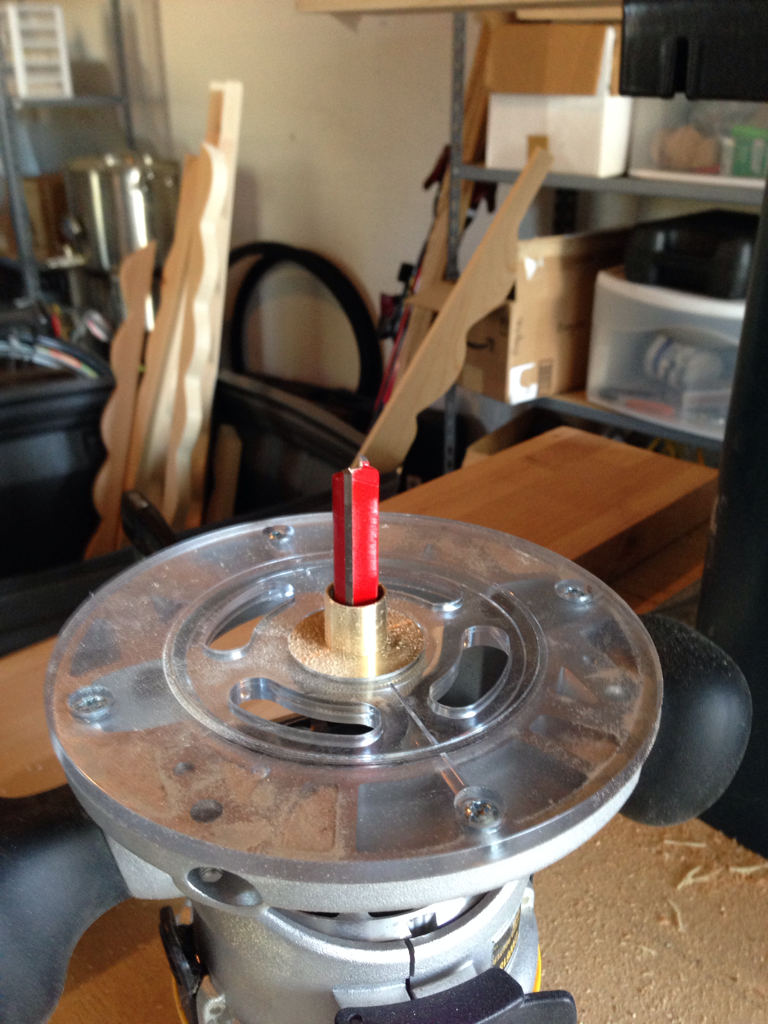
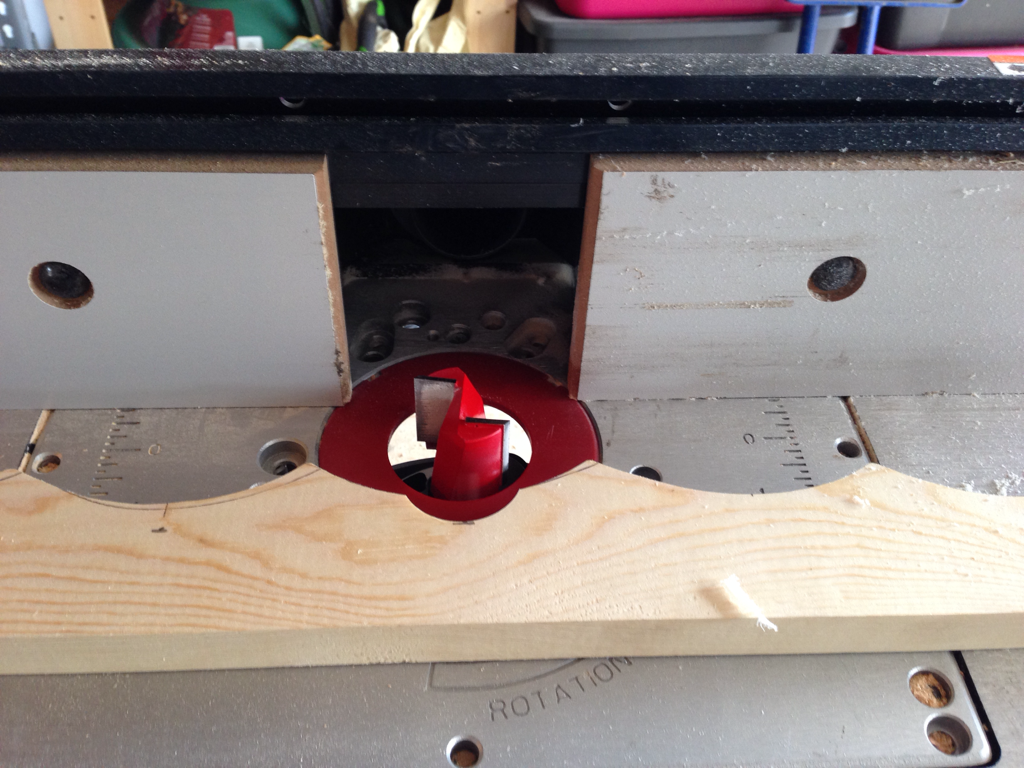
I played around the the neck holes a little as well. Stu's were a little deeper than I felt was really necessary, although I agree that the bottles aren't secure enough for my tastes without any notch at all. I settled on about 3/8" deep. As I said, doing the holes with a drill was no fun, so the router came to the rescue again:

oDb3AUG.png


(Why, yes, that is a massive 1.5" router bit.)

I made some attempts at building a guide jig for this, but they weren't very satisfactory. Ultimately I did something your shop instructor probably wouldn't approve of and just freehanded it.

(Also, not pictured, but once again, the router did the cuts in the separators. I clamped about 6 or 8 of them together at a time, and ran them through as a set. Otherwise it's pretty hard to get a straight cut.)

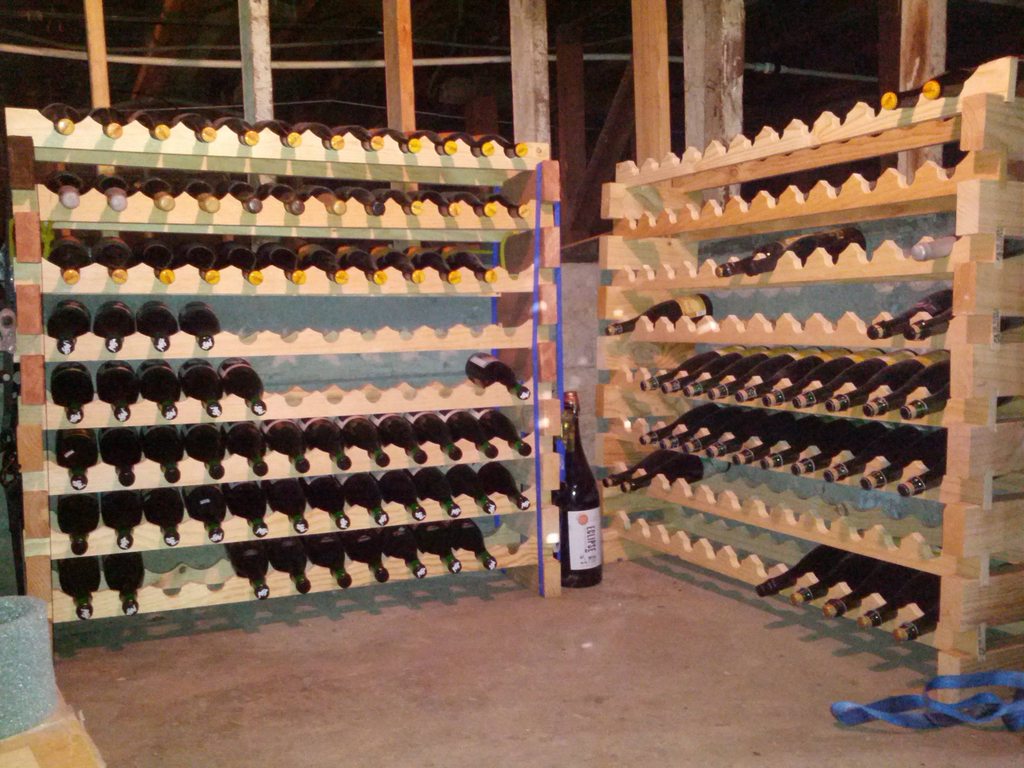
Final results:

WYjgth7.png


For my next batch, I will probably take the time to make a fresh set of templates; in particular, making a perfect circle router template so I can actually get all the slots consistent.
Yeah, a lot of the stuff I do is just because that's what I have. I have no doubt that a router would improve this a lot, but I don't have one!

I'm not sure what you mean by the back curves not being the same, do you mean that the spacing between the curve and the bottom is different? That's definitely true, and it's done so that I could make a deeper hole on the fronts. I really wanted that hole to be deep since I have to worry about earthquakes, and the standard curve location wouldn't leave enough room to make the hole as big as I wanted and still have any structural integrity at all. If you're only going to make a 3/8" hole you can probably handle the same pattern on both (since I moved it up 1/4", IIRC, that'll leave more material than I do).

Anyway, I'm glad someone made these and posted the results! Awesome.
 
Back
Top